
This post is for you if you want to take photos of small-to-medium-sized objects with a pure white background for your blog, research paper, shopping site, or book with no fuss.

Taking photos against a white backdrop and with minimal shadows is difficult—that’s what I thought before I had a light box.
I am not a proficient photographer by any stretch: I have a neat little Canon Powershot S110 with a zoom lens, and I have a couple of smartphones.
In the past, when taking pictures of smaller items for my blog, I just used a table, white cardboard or a white towel, and daylight.
At some point, a friend asked whether I could help her take pictures of two products for her shop. They needed to be on a white background.
I was surprised how difficult this actually was—obtaining a completely white background. It took me a full day to get acceptable photos for two items.
This got me thinking:
I wanted to use more and better-looking photos on this blog, but I didn’t want to spend hours for every single image. I also wanted to take photos independent of the time of the day.
After some research, I got myself a photo light box (aka light tent) with integrated LED lighting and a small, but precise tripod.
This light box has been one of my favorite and most productivity-enhancing purchases in the last 12 months.
My Current Procedure for Taking Photos with This Light Box for My Blog
I use a 20 x 20 x 20 inch photo light box with integrated lighting. For more on my requirements see below.
You could also use the following steps to produce photos for a shopping site like Amazon or ebay.
1. Place the light box on a table and the tripod with the camera in front of it.
2. Set the camera to Aperture mode (AV on Canon) and zoom in as much as necessary to fill most of your camera display with the object you want to take a picture of.
With Aperture mode you manually control the aperture while the camera selects the shutter speed. Sensor sensitivity is set to ISO 100.
My camera also has a Manual mode where you can control everything, including aperture and shutter speed. This takes too much time for my purposes.
Depending on the zoom-level and the size of the item, I choose an aperture from between f/4.0 to f/8.0 (the highest f-number I can set on my camera is f/8.0).
The higher the f-number, the more of the scene is in focus, so if part of my object is blurry, I increase the f-number.
With f/8.0 and good lighting you can hardly go wrong.

3. Set the image brightness (exposure compensation) using the histogram in the upper left corner of the camera display. Increase the brightness until the histogram touches the right edge.
The image histogram is a graph that represents all pixels in the image: the darker areas are to the left while the brighter areas are on the right side. For more information on reading and using histograms, please check this post at digital photography school.
Histogram at +1 exposure:

At +1 1/3 exposure the histogram touches the right edge:

The right edge of the histogram represents pure white, while the left edge is pure black. Since I want the background to be white, I increase brightness and thus shift the histogram to the right until it touches the right edge. This way, large parts of my backdrop should be white.
Don’t clip too much of the histogram by shifting it over the display edge: you might lose image information.
Conversely, if I wanted to shoot with a black background, I would adjust the exposure control so that the histogram touches the left edge of the display.
The histogram is a good aid, but I usually take a couple of shots with increasing exposure compensation for comparison. In the current example I would shoot at +1, +1 1/3, and +1 2/3 and then take the best image for post processing.
How to Make the Image Background Completely White
The light box helps a lot with achieving good lighting and minimizing shadows. However, I usually don’t manage to get a completely white background, even if it looks like one on the camera display.
This, however, is not a problem:
To create a pure white background I use the levels tool in the free photo editing program GIMP—available for Windows, MAC OS X, and Linux.
Adobe Photoshop also has a levels tool and is more sophisticated, but currently I wouldn’t use it enough to justify the subscription costs. Besides, GIMP does most of what I want really well.
1. Open the image in GIMP.
2. Go to Edit->Preferences->Image Windows->Appearance and set the canvas padding color to white as shown below.

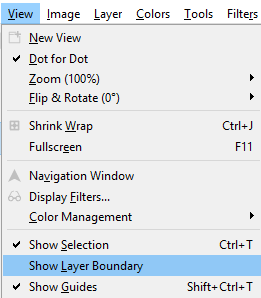
3. Turn off the layer boundary (View->Show Layer Boundary).
4. Select Colors->Levels from the menu to show the Levels tool.

The levels tool also shows the histogram of the image and features three sliders (triangles) that can be used to modify the image.
5. Move the right triangle to the left until the grayish background completely disappears and the image blends in with the white canvas padding.
If I am not yet satisfied, I play with the left-most triangle until I like the result. This is generally enough for my purposes, i.e., posting the image on my blog or in inserting it into a document.

That’s it for me.
You could perform additional steps, if the image gets too bright. I usually don’t do anything more though; the marginal improvements most often don’t justify the extra time spent.
As they say in Chinese, 差不多 (cha4 bu4 duo1)—not perfect, but not faulty by much, or “good enough.”
6. Finally, export the image as a jpg file. For my blog, I set the jpg quality to 60.
How Do I Take a Picture of a White Item Against a White Backdrop
I would need to brightly light the complete background so that it appears whiter than the object.
I find this difficult to do, so I just shoot the item in the light box against a dark or even a white background and have an expert remove the background.
I use Fiverr to find freelancers to help with this. Photo background removal services on Fiverr start from $5 for multiple images.
I get my images returned with a transparent background. I ask for psd and png formats and then use GIMP to put my images on a colored or white background.
Can you use a smartphone to take good photos with a light box?
Yes you can.
Here is the photo of a watch taken with a smartphone using a light box.
I did this shot with a Samsung Galaxy S4, a rather old phone, but it had a good 10 MP camera at the time. If you have a newer Android phone or iPhone, you should be able to take great photos with a photo light box and a tripod.
Unedited smartphone photo

After applying the Levels tool in GIMP

You can even use a normal camera tripod with your smartphone via an adapter.
Which Light Box / Light Tent Do I Use?
My requirements
Size:
- 20 x 20 x 20 inches. This size is a great compromise as far as I am concerned. I can take images of objects of about 12 x 12 x 12 inches.
- A smaller light tent severely limits what you can photograph
Lighting:
- Uniform, integrated lighting
- Consistent lighting throughout the day, so that I can take photos at any time.
- Minimal shadows without a complex and time-consuming lighting arrangement
Others:
- Standardized object-camera distance
- Light-weight
- Multiple voltages, so that I can use it worldwide
- Economically priced
Amzdeal Light Box Photo Studio, 20 x 20 x 20 inches
I looked at several solutions, including translucent light tents that are lit from the outside.
I settled on the Amzdeal Light Box Photo Studio.
It comes with two magnetic LED-strips that can be moved easily along the frame to adjust the lighting.
Included are 4 sturdy, matt, plastic backdrops (white, black, grey and orange) that can be wiped.
There is no crease in these backdrops. With some other light tent solutions, you have to iron out creases or edit them out in Photoshop.
The light box can be assembled and disassembled in a couple of minutes and transported in the included carrying case. It easily fits in my suitcase.
Tripod:
Again, I was looking for something light and economical.
A tripod makes it much easier to replicate setups and shoot with longer exposure times.
I wanted to use it on a table, so I didn’t want a full-height tripod. It had to be steady, sturdy, and precisely adjustable though. IMO, these flexible mini tripods for 10 bucks are a waste of time. You can’t replicate the settings in future shots.
While on a trip in Germany, I bought the Velbon EX-Mini. It ticks all the boxes for me.
If you want to use the tripod with a smartphone, you’ll also need a tripod adapter.
That’s it for today. I have found myself a great time-saver with my photo light box.
Have a great day.
Notes:
A good explanation on how to use aperture in various settings can be found in the post Introduction to Aperture in Digital Photography.