WHAT IS ONENOTE?
 OneNote is part of Microsoft’s office suite, and an extremely versatile note taking and outlining application. It allows you to create rich notes which may include text, tables, formulas (OneNote 2010), tags, images, audio, and video recordings. You take your notes on pages in a OneNote notebook – and your notes can be anywhere on a page as on a sheet of paper. The pages in your notebook can be organized in section groups and sections. You can tag items (sentences, images, paragraphs etc.) in your notes to label them as questions, comments, to-do items, ideas etc.
Two popular ways to take notes in OneNote:
- Annotating documents: You can cut and paste, print, scan, or photograph almost any document to OneNote and then highlight it and take margin notes (or notes anywhere else in the document).
- Outline note taking: You can use OneNote as a folding outlining application (Outliner) and create collapsible hierarchical summaries.
Printed document highlighted and annotated in OneNote:
USING ONENOTE AS A FOLDING OUTLINER
Outline note taking (Outlining) is very similar to creating a table of content for a document and a very powerful note taking technique, as well as a prewriting activity to create the scaffolding for a book, research paper, blog post etc.
What is an outline? An outline contains the main topics in a logical arrangement, leaving out the details. It can be flat, that is a list of topics, or hierarchical with headings, subheadings and so on. Because many texts are organized in a hierarchical fashion, including chapters, sections, and paragraphs, hierarchical outlines can be very effectively used to summarize them while reading.
In OneNote, information subsumed under headings and subheadings can be collapsed and thus hidden (e.g. by putting the cursor in front of a heading with indented text below, and double-clicking). This way, you can easily summarize a whole book or book chapter in one hierarchical outline. Once you are done with summarizing a paragraph, subsection, section or chapter, you just hide its summary under its heading. Collapsed headings, together with tags can be used very efficiently as cues to review and test your recall.
A book chapter outline in OneNote: Let’s take a look at an example outline for a book chapter: A few months ago, I read the book “Discover Your Inner Economist” by Tyler Cowen. The following is my outline for the chapter “How to Control the World, the Basics”:

Notice the + symbol in front of each of the headings. It shows something is hidden under a particular heading. By double clicking on this symbol you can expand the heading. An expanded heading can be collapsed, by double clicking once more.
Before reading any further, ask yourself: When would you give money as an incentive to a person?
Now let’s expand the heading:

In this way, you can use an expandable outline to test your memory. The heading “Careful” has subheadings which you again can expand and collapse:

In essence, you can use this approach to browse through your summary at different levels, or to test yourself on different levels, using headings and subheadings as cues. OneNote Tags provide a good way to keep track of your progress, as well as outstanding questions and ideas that might come to mind:  For more information on OneNote Tags, please also read Using OneNote Tags.
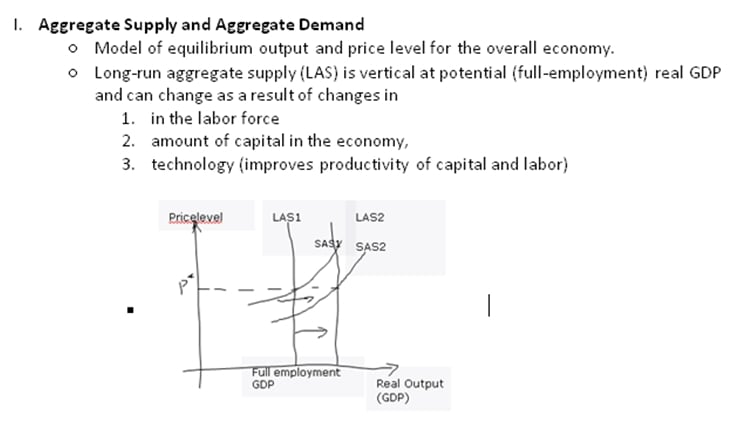
The information you can use in a OneNote outline is not limited to text. Other items, such as videos, images, formulas, tables or a combination thereof can also be hidden under a heading as can be seen in the following snippet from an outline on economics:
[adsense]
HOW CAN YOU CREATE YOUR OWN OUTLINE?
Let’s say, you are reading a book chapter: Start by surveying the chapter to get an overview. Next follow these steps:
- Recreate the complete chapter hierarchy in OneNote using the section headings (and if available sub section headings).
- Read each paragraph and distill its main idea. Then use your own words to note down this main idea under the corresponding section heading.
- Depending on the purpose of your reading, write down the most important supporting details under the paragraph’s main idea.
- Having extracted the main idea for each of the paragraphs of a given section, you should have a pretty good idea about the main idea(s) of a section.
- You may find some paragraphs’ purpose is mainly to emphasize a point already made, illustrate a point, or pure entertainment. Use this knowledge to combine the main idea statements for different paragraphs and eliminate redundant ideas.
- As a final step, formulate a main idea for the section in form of a sentence and write underneath the section heading.
This 6-step guideline is only one way to go about outline note taking. As you become more experienced, you will intuitively combine across paragraphs and sections.
What if your document doesn’t have any headings? If your document doesn’t contain section and subsection headings, you can still note down the main idea for each paragraph. Create your own sections and subsections as you see fit, and thus build a hierarchical outline.
How to create headings and subheadings in OneNote?
- Start by typing you first heading and choose the numbering or bullet style from the Home ribbon:

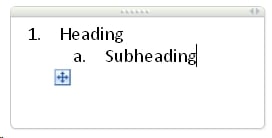
- To create a subheading, just press the Tab key. This indents the text and creates a sub heading. OneNote automatically chooses a different numbering format/ respectively bullet format (which you can change of course):
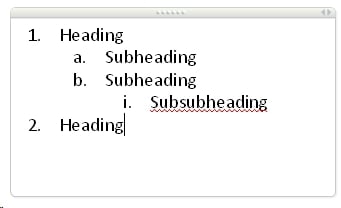
- To move back from a subheading to a heading, use Shift-Tab:
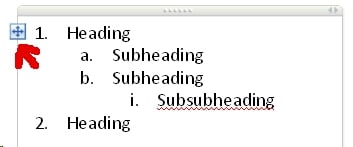
- To collapse all information under a heading, double click in front of the heading. To expand the information again, double click once more:
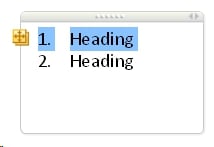
I hope, I could encourage you to try outline note taking, and to try OneNote. If, for some reason, you cannot or don’t want to use OneNote, a multitude of alternative applications for all kinds of platforms is available. Outline note taking is a powerful technique no matter which application or platform you choose.
 10 simple actions that can double your productivity
FREE guide of my top productivity hacks for subscribers to my free newsletter


very helpful. thx!
I’ve been looking for this tip for a while. I’ve just started using OneNote and am doing some research for a historical fiction novel. Based on your post, each book I read will be outlined on its own page in the Research section of my WIP. Thanks for the help.
Hi Kathryn,
Thanks for stopping by. To me it sounds like you have found a very suitable tool for your work. Keeping the outline for a complete book on one page is also how I usually work. This is where OneNote’s folding function comes in very handy.
Is this supposed to work in OneNote 2013? I don’t see the [+]…
Hi,
Yes this should work in OneNote 2013 (e.g., in OneNote 2013 under Windows 7). The plus sign only appears in front of text where something is hidden (folded) underneath. Try the following: Create a new page and type “heading 1.” Press Enter, followed by Tab to indent the second line. Type “heading 2.” Double-click on the empty space to the left of “heading 1.” The text “heading 2” should disappear (“be folded underneath heading 1”) and you should see a plus sign instead. On Android and in the web app, unfortunately, OneNote does not yet allow folding of text.
I hope this helps a bit. Have a nice day, and thank you for stopping by!
Ah, ok, double-clicking the tag-shape turns it into a plus. If it looked like a minus, I might have figured that out.
Thanks. Will have to try it on iOS and see if that works.
I take it the collapsable headings don’t work on the web version? It works on my desktop app, but I’ve had no success with the web version. This is rather important to me, since I can’t install the desktop version on my work computer where I need it … and the collapsable text feature is the only reason I’m looking at OneNote in the first place.
Hi Will,
Yes, as far as I know the OneNote web app does not support folding, and outlines appear completely expanded. I love collapsible outlines and hope that Microsoft will implement the folding function for the web app as well. That being said, the full Windows OneNote client has a lot more going for it. If your workplace has licensed Microsoft Office or Office 365, that license most likely includes OneNote. Maybe you could get them to install it for you?
Thanks for your feedback and have a good day!
How to toggle betwween expanding and collapsing. I mean, how do I create one link that can be used to toggle between Expand and Collapse. I get this question from the Outlook feature that lets you send meeting minutes to OneNote. When one sends the minutes from Outlook to OneNote, you can see a “Expand” and “Collapse” toggle as a single link. How do I create one such link myself. Thank you.
Hi Ji,
I am not quite sure, what you mean – and unfortunately, I don’t have Outlook installed. Please feel free to send a screenshot to info[at][blogdomainname].
I usually use key strokes to expand and collapse outlines. The following table summarizes the keystrokes:
support.office.microsoft.com/client/Keyboard-Shortcuts-for-OneNote-2010-7504CF95-1A03-40D9-9544-090901174620?NS=ONENOTE&Version=14
All the best.
This is amazing! I was hoping that OneNote 2016 had this functionality, but couldn’t find it at all, it’s not exactly obvious on how to fold it. Thank you, thank you, thank you, this will be so helpful when I’m reviewing and studying my class notes
Hello Kelly,
thank you very much for your kind words.
Yes, OneNote 2016, 2013, 2010, and 2007 all have the folding outliner. I am still using this feature to this day.
Apart from testing yourself for exams, another useful application is brainstorming:
I often jot down a list of topics. Then I might focus on one of the topics for a while. What usually happens is that the topic keeps getting larger and larger, with lots of related sub ideas and sub-sub ideas.
At some point, when I get overwhelmed by the granularity, I just start folding sub ideas. At a later stage when I get to clustering ideas, it is also so much easier to move a whole idea tree around rather than individual bullet points.
Have a great day.